If you are using JIRA or Confluence alone, then there is so much you are missing out on. JIRA and Confluence fit together like two pieces of a puzzle, giving users and managers a pair of interconnected platforms to plan, execute and report on tasks within ongoing projects.
1. Install JIRA and Confluence in Separate Containers
While both JIRA and Confluence are designed to complement each other perfectly, it is important to remember that they exist as standalone pieces of software. During installation, the two programs should be treated as such. Deploying the two products together in a single Tomcat Container is certainly not recommended and can lead to major operational issues for both.
For example, it will not be possible for you to configure separate startup orders for applications within the container, which will cause major issues if you are using the Crowd application to provide secure access. Memory allocation problems and other issues can also be caused by deploying JIRA and Confluence together in this manner.
Instead, install the two programs separately and use an application link for integration. The application link need only be set up once and it will unify the functionality of JIRA and Confluence whenever you use the programs, enabling you to experience the benefit of these two applications in tandem.
2. Enable Cross-Application Views
In order to get the very best out of JIRA and Confluence, you need to be able to view components from one program in the user interface of the other. Doing this is remarkably simple and will dramatically boost the efficiency of your working practices.
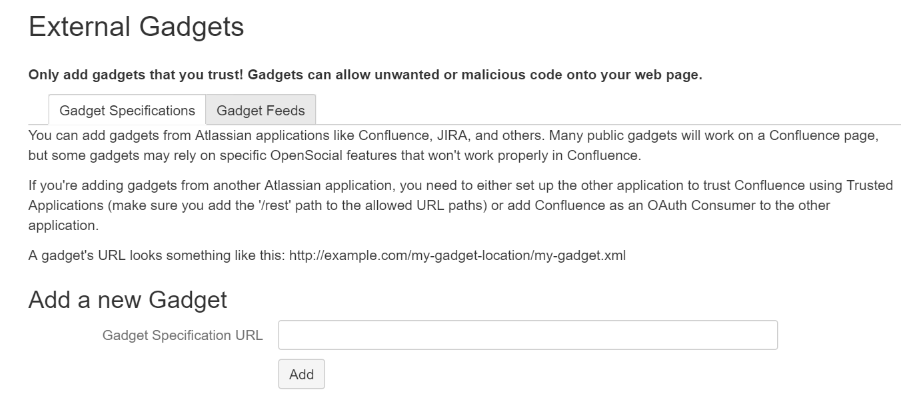
To display the JIRA dashboard within the Confluence window, first open Confluence and then use the General Configuration tab to register which external JIRA gadgets you wish to add. These gadgets can then be viewed in Confluence’s list of registered gadgets.
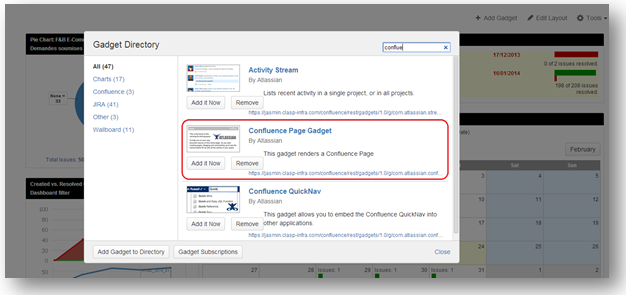
Performing the opposite function and displaying Confluence pages within the JIRA dashboard is even easier. To accomplish this, simply create the application link, then open JIRA’s gadget directory. The Confluence pages will be listed in this directory and you can configure which ones you want to view from here.
3. Flag and Resolve Issues
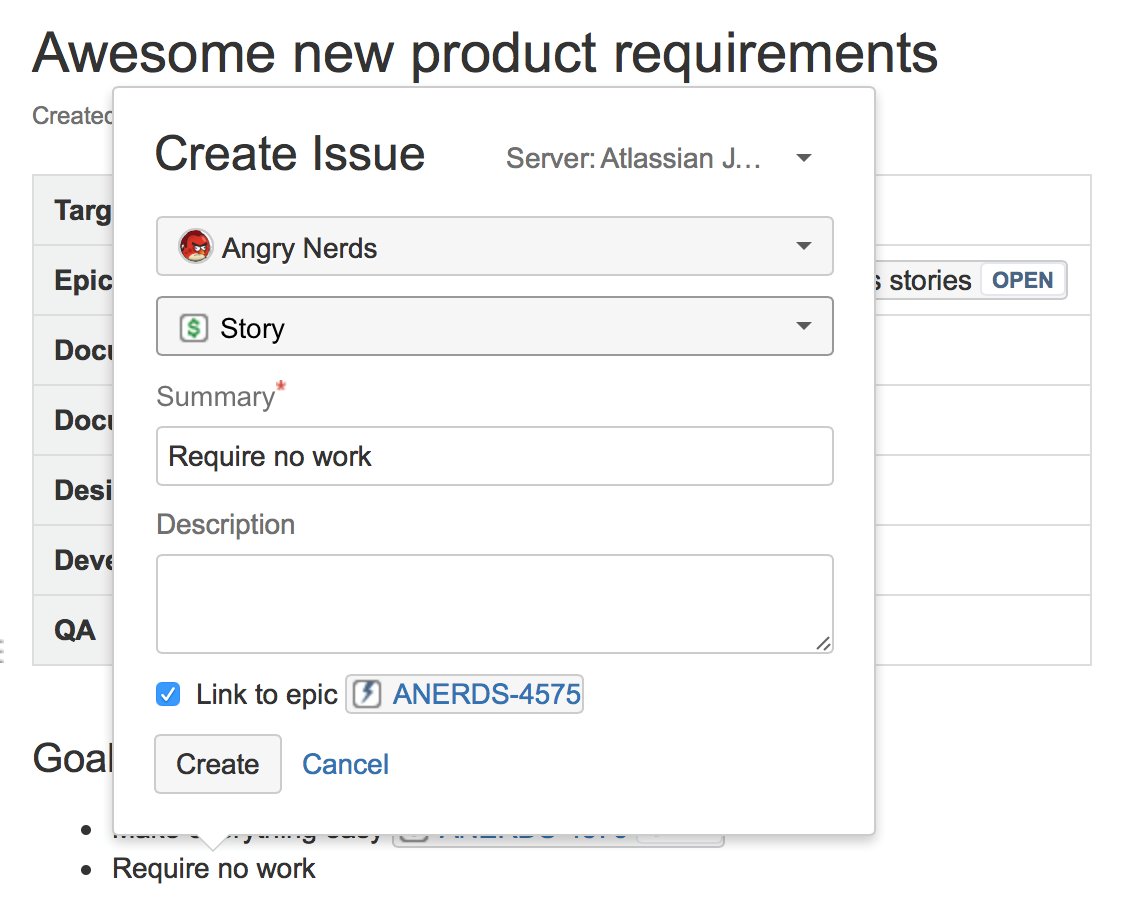
Confluence is designed to make it simple to create JIRA issues and then track their progress. Once the application link has been created, select the Create New Issue tab in the Confluence window and use the form to register a new issue. You will be able to select which project the issue relates to and the type of issue being flagged via drop down menus, before adding a summary and a more detailed description of your own. Later versions of Confluence (v.5.4 and higher) have streamlined this process even further, enabling users to highlight specific text within the Confluence page and then create an issue in JIRA by clicking the icon.
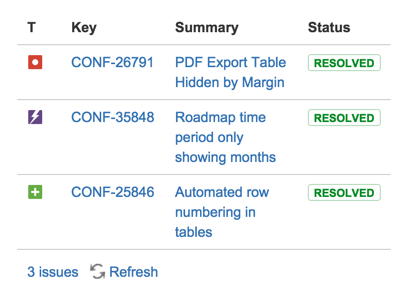
The progress of these issues can then be tracked without ever leaving the Confluence window by selecting the Search tab in the JIRA Issues menu. This will provide the user with a list of current and recent issues for each project along with information regarding their type, summary and current status.
Take a look at this video for further information on this one:
4. Take Advantage of Smart Reporting
Confluence provides you with the tools to manage, configure and present information stored within JIRA via its smart reporting functionality. Users can enter the JIRA Report blueprint within Confluence to log any changes to projects or to provide a general status report. This works alongside the data already stored by the JIRA application to create a useful and easily-referable information resource, which can be viewed and presented using the JIRA Chart Macro. This function enables the user to view data tracking reports across a variety of metrics.
The data collated and expressed by these reports can also be displayed within the Confluence pages themselves. JIRA Gadgets can make detailed charts and reports available to users as they view specific Confluence pages.
5. Oversee and Support Project Teams
The work carried out on your project can be broken down into sprints (short term periods of intense work to deliver quick results) and epics (longer term tasks). To devise a strategy for one of these tasks, you have to first go into JIRA and create a Confluence page using the Meeting Notes Blueprint. This forms a template which can be used to plan the task and deliver details and information directly to the team.
Users can create multiple Confluence pages via the JIRA application to provide ongoing information and support to project teams. The progress of each project can then be logged within Confluence and quickly and easily viewed by all users with the necessary permissions, enabling streamlined and highly-efficient collaborative work.
6. Use the Pre-Programmed Button to Toggle Between Applications
While a variety of JIRA functions can be executed without leaving the Confluence application, and vice versa, it is still useful to be able to move quickly and easily between the two pieces of software.
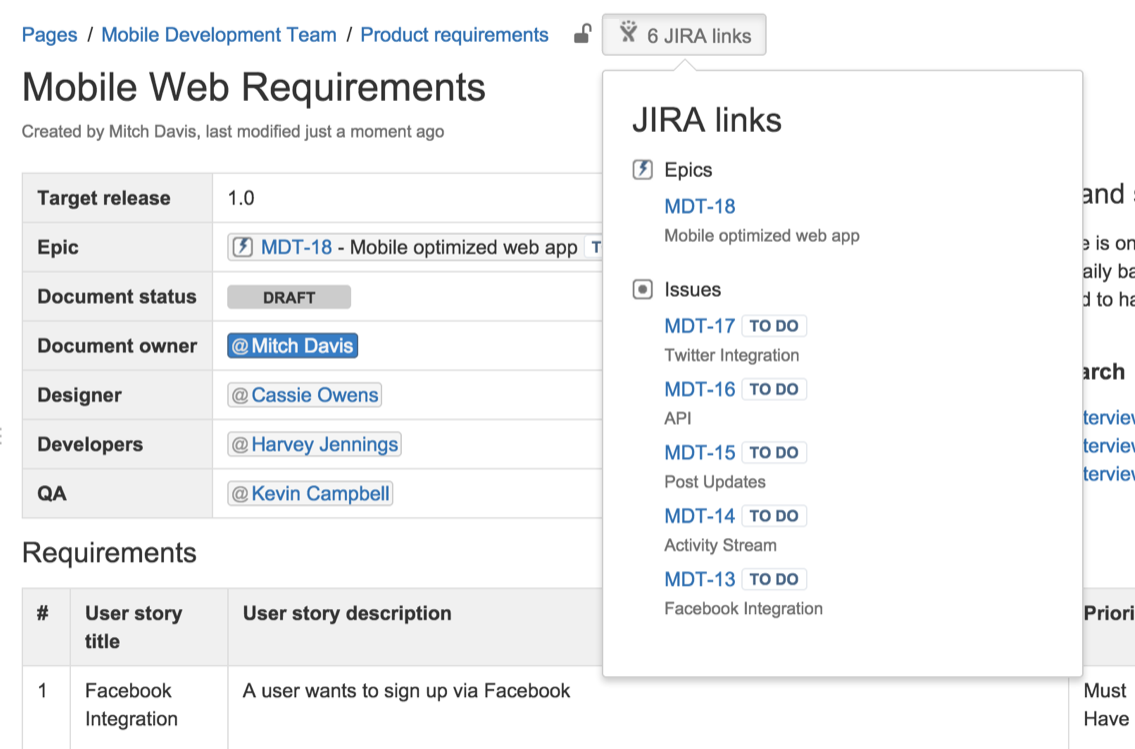
Providing the two applications have been linked, a JIRA Links button will appear in the menu at the top of your Confluence page, giving users the ability to toggle between the two applications with ease. You can also use this button to access a dropdown menu displaying details of any issues, epics and sprints that have been linked to the page.

